
Note: The screenshots in this article may appear differently on your GAL system, depending on the communication options you selected during implementation. For example, the SMS Settings tab will not appear unless you selected an SMS delivery method during step 2. Contact support@resolver.com for further information.
Fill in the Message Settings tab:
Click the Close this Message with Event checkbox if you want the message to stop polling for responses and statuses when the Event is no longer active. However, the system will only let the message remain open a finite number of days (depending on your configuration settings) even if the event is not closed. Performance can be impacted if there are a significant number of open messages.
Type the number of days the message will be open next to Days Message will be open. This field will not appear if the Close this Message with Event checkbox has been clicked.
Click the Make this message a quota checkbox if the message includes responses that will be used to affect the workflow of your plan.
Click the Allow dynamic categories checkbox if the message category will be dynamically added by an Incident Submission Form or Interactive Voice Response.
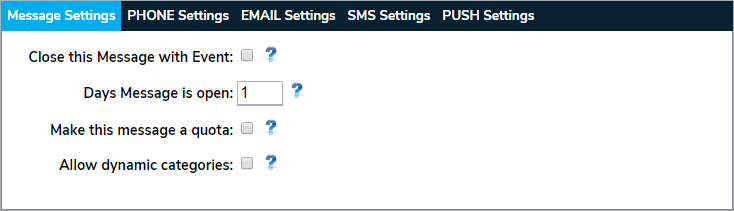 The Message Settings tab.
- Specify if the message should use subscription categories.
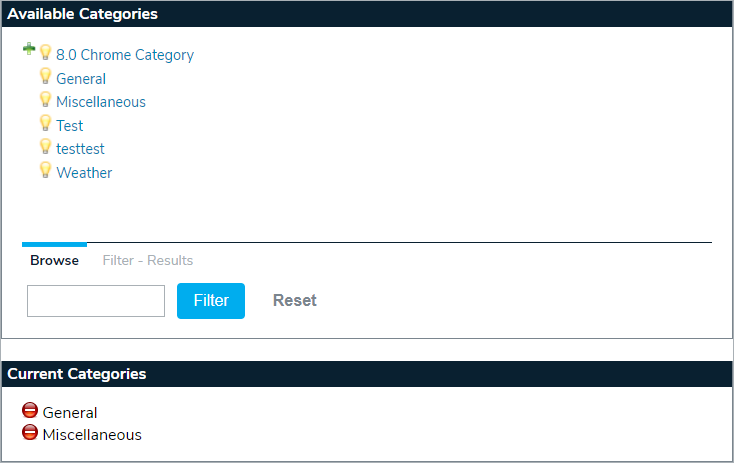 The available subscription categories and currently selected categories.
Fill in the PHONE Settings tab:
Select the language of the initial greeting (e.g. "This is an important message from...") and the response instructions (e.g. "Please press 1 for...") in the Language Code dropdown.
Type the maximum number of attempts to notify the recipient(s) in the Max Attempts field.
Type the number of seconds between retry attempts in the Delay Between Attempts field. For example, typing 60 will specify a one minute delay.
Type the message's text-to-speech speed as a percentage in the Voice Speed field. For example, typing 80 will define an 80% voice speed.
Choose the gender of the message's voice from the Gender dropdown list.
Type the number that the voice call will originate from in the Phone ANI field. Numbers must be entered as either XXXXXXXXXX or CCXXXXXXXXXX (with CC being the country code). Entering an invalid number or non-numeric characters, including spaces or dashes (-), will result in undeliverable phone messages.

Entering an invalid number will result in an undeliverable phone message. 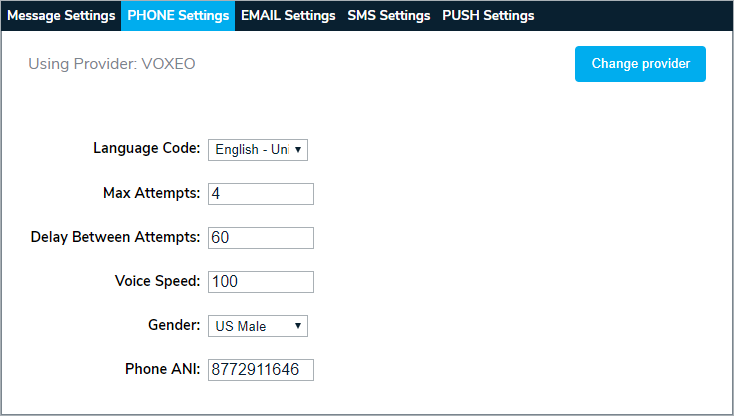 The PHONE Settings tab.
Fill in the EMAIL Settings tab:
Type the prefix of the transmitting email address in the From Address Prefix field. For example, typing in "alerts" will result in the email being sent from "alerts@exampledomain.com". Multiple prefixes can be configured for your system.
Enter additional text to accompany the response options in the Response Header field. This will appear above the response options in the email text.
Select the language of the initial text and response instructions in the Language Code dropdown. Ensure the selected language matches the messages entered in Step 1: Compose Message.
Type the maximum number of attempts to notify the recipient(s) in the Max Attempts field.
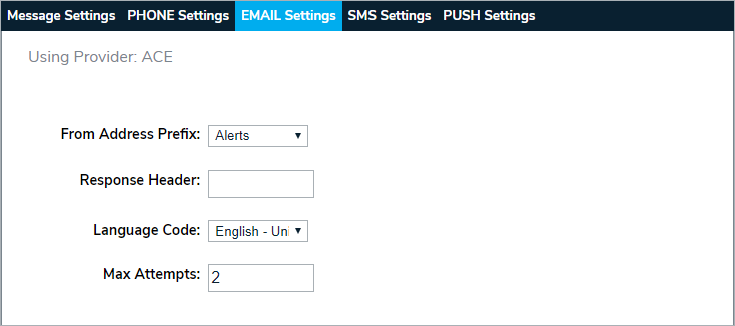 The EMAIL Settings tab.
Fill in the SMS Settings tab:
Select the language of the initial text and response instructions in the Language Code dropdown. Ensure the selected language matches the messages entered in Step 1: Compose Message.
Type the maximum number of attempts to notify the recipient(s) in the Max Attempts field.
Enter additional text to accompany the response options in the Response Header field. This will appear before the response options in the SMS text.
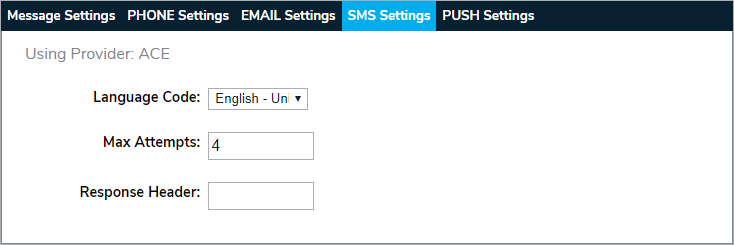 The SMS Settings tab.
Currently, there are no options under the PUSH Settings tab.
Once the settings are configured as desired, click Forward to move to Step 4: Confirm & Send.


