
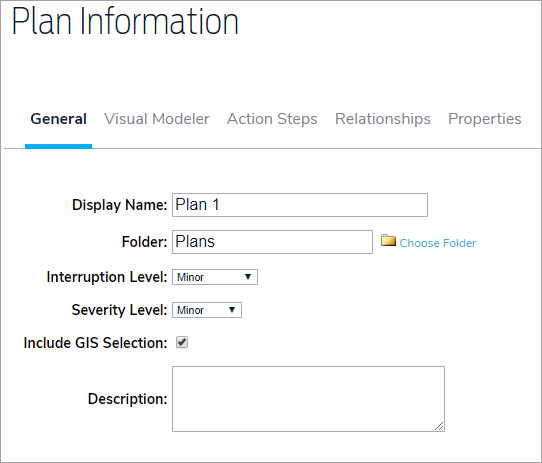
If the Include GIS Selection checkbox is selected on a plan, upon activation, users can search the map using circles and polygons to determine which contacts and contact folders will be included. Note that Standard Mapping Services does not include the Search Bar (Geo Coder), Query Select Tool, or the ability to deselect the Drawing Layer.
- To make a GIS contact selection on a plan, ensure the Include GIS Select checkbox is selected on the plan.
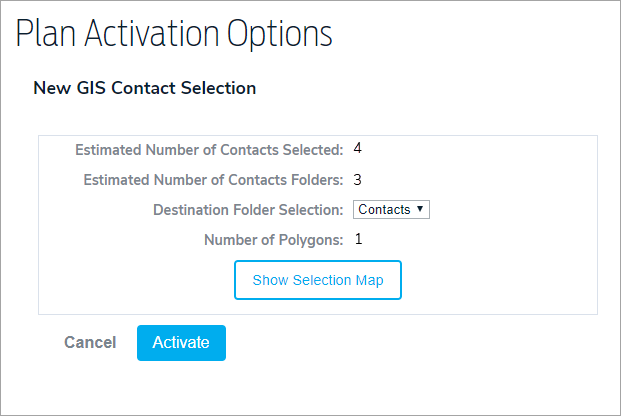
- Click Activate, then Confirm.
- Click Show Selection Map.

- Click the
 icon to display the Base Layer options and make a new selection is needed.
- Click one of the following icons in the top-right corner of the map to make a selection:
 Navigate. Click this icon to click and drag the map to a new location.
 Draw a circle to select items.
 Draw a polygon to select items.
- Click the
 icon to save your selection and return to the Plan Activation Options page. To clear the selections, click the
  icon. To clear the selections and close the map, click the
  icon.
icon. - Click Activate, then Confirm.


 icon to display the Base Layer options and make a new selection is needed.
 Navigate. Click this icon to click and drag the map to a new location.
 Draw a circle to select items.
 Draw a polygon to select items.
 icon to save your selection and return to the Plan Activation Options page. To clear the selections, click the
  icon. To clear the selections and close the map, click the
  icon.
icon.

